About the Printrbot Jr -- July 2013
Printer
Electronics
Hardware
Last Updated June 2024
About
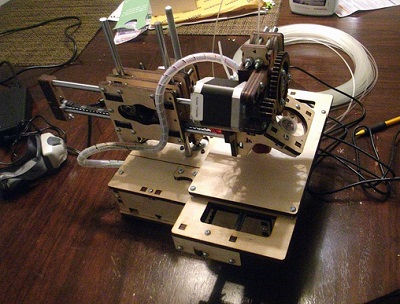
For experimentation purposes, I bought a Printrbot JR 3D printer when the wooden model (Version 1) was still being sold.
With that printer, I've been able to fine-tune it to reliably print at 0.3 mm layer heights and sometimes print at 0.1 mm resolution.
Over the past years I've performed minor updates, mainly replacing the printbed (first to acrylic (which melted), then to 4130 steel), and updating the firmware.
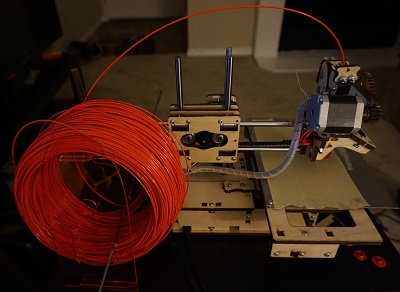
I have since upgraded to a newer printer, but even with this older printer I was able to reliably print with it, accounting for the limitations and strengths of its design.
Software Settings
To reliably print with this printer, I have used the following settings:
| Parameter | Setting | Units |
|---|---|---|
| Heater Temp | 196-200 | OC |
| Perimeter Speed | 60 | mm/s |
| Small Perimeter Speed | 60 | mm/s |
| Infill Speed | 80 | mm/s |
| Support Speed | 90 | mm/s |
| Bridges Speed | 90 | mm/s |
| Gap Speed | 30 | mm/s |
| Travel Speed | 130 | mm/s |
However, those settings are only applicable when using either Repetier-Host or Matter Control to load up the STL file, Slic3r to slice the file into layers, and either program to send the slices to the 3D printer for printing.
To actually design the models to 3D print, I either use an existing model on Thingiverse or design my own.
Designing a 3D model can be done with a variety of software:
- Autodesk Inventor: Sketch-and-constraint based 3D modeling software. Expensive for both personal and professional use, but I have used this software in high-school design courses.
- Blender: Subdivision freeform modeling tool. Has an immense learning curve and is very focused towards the arts, making it harder to design objects to precise dimentions.
- BRL-CAD: A CSG-based modeling tool, with extensive functionality. Has a moderate learning curve. I used this for a few models before moving onto other software.
- OpenSCAD: A CSG modeling tool designed heavily for programmers and those who need to script objects. It's not always the fastest, but is useful enough that I continue to yse this for a good number of my 3D printing projects.
- Solidworks: Sketch-and-constraint based 3D modeling software. Expensive for both personal and professional use, but I used this software throughout university.
- Wings3D: A subdivision modeling tool like Blender, but with a much easier to use UI. However, just like Blender, it is not focused for engineering designs. I use this tool sparingly.
- ... There are many other tools out there, notably FreeCAD. However I don't have enough experience with other tools to rate them.
At the end of the day, the software isn't what makes a good design. A good design comes from a good idea and a time commitment to implement it. Tooling helps express the design efficiently, but doesn't itself form the design.
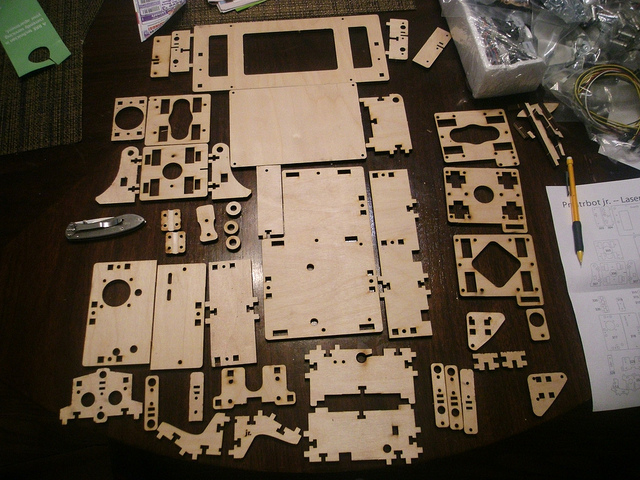
One great example of this is the Printrbot's laser-cut parts -- there are many parts, but
they all work together to allow you to make more parts of your own designs.